Shop AutoMeter Gauges Marken Performance 1-888-401-1362
Auto Meter now gives you customizable options for your gauges. Gauges are an important, yet often over looked, part of any hot rod build. With AutoMeter, you can now customize your own gauges to your liking to bring your ride up to the next level, and know they will be accurate.
Auto Meter has an online application called the Auto Meter Custom Shop, that allows you to customize their dependable gauges to suit your exact application. Today, we’ll walk you through the process while we create some gauges of our own.
For custom gauges go to www.ampcustomshop.com/what-custom-shop and read the page, then click on “Start Customizing” at the top left which brings you to this page: www.ampcustomshop.com/custom-kit/start. Input the number of gauges you need and select the base style. The typical 5-gauge set-up includes a speedometer, oil pressure, water temperature, voltmeter, and fuel gauges. There is a tutorial video on the previous page, or view it here: youtu.be/g41pRYP0Ll4.
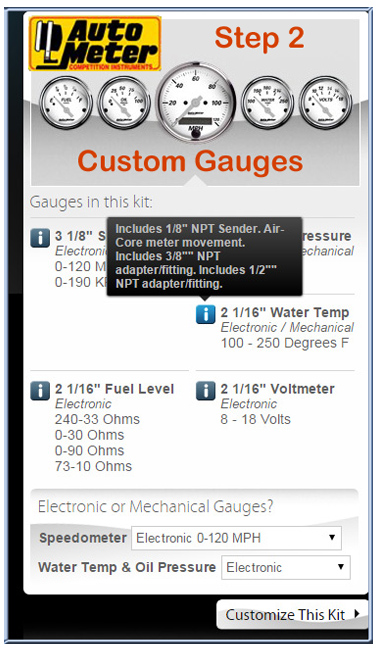
Now back to the example after your base selection and number of gauges. More information is available by hovering over the 'i' icon. See Pic Step 2. Toggles at the bottom of the screen allow you to select either electric or mechanical configurations for both your speedometer and oil pressure gauges. There is also an option that allows the selection of either miles per hour or kilometers per hour for your speed measurement. Pick the size of your gauges.
Once you’ve chosen the kit that will best suit the application, click on the Customize This Kit link to access the next page. Once the correct impedance of your fuel gauge is selected (Step 3), the Custom Shop opens up and you can really tailor your gauge set to your vehicle. For assistance please call AutoMeter technical services department (toll free) at 866.248.6357.
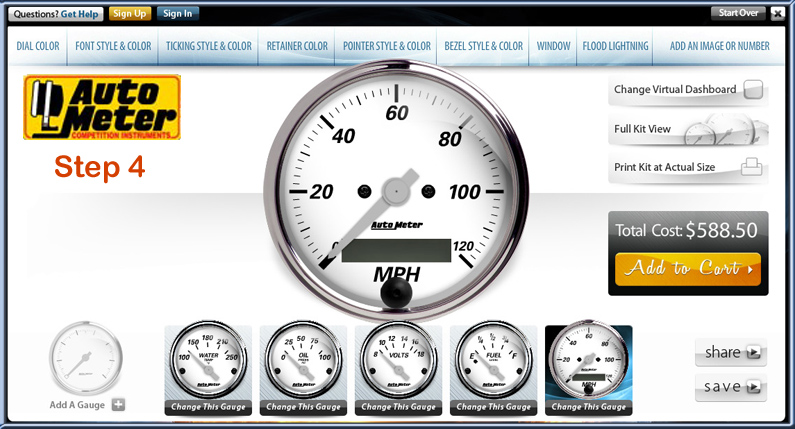
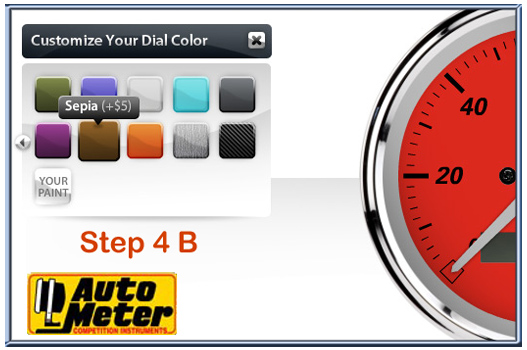
Across the top of the page in the Custom Shop Auto Meter has broken down the different parts that make up a gauge into different navigational tabs (Pic Step 4, 4B). From trim ring to dial background color everything is configurable at the click of a button. You can choose a color using the pinwheel, or have the gauge faces sent to you for paint by selecting customize your dial color.
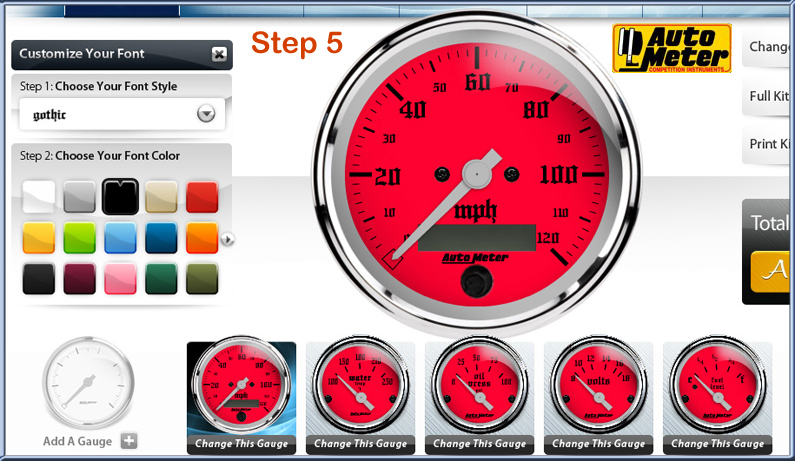
The next step is to choose a font style and color (pic step 5).
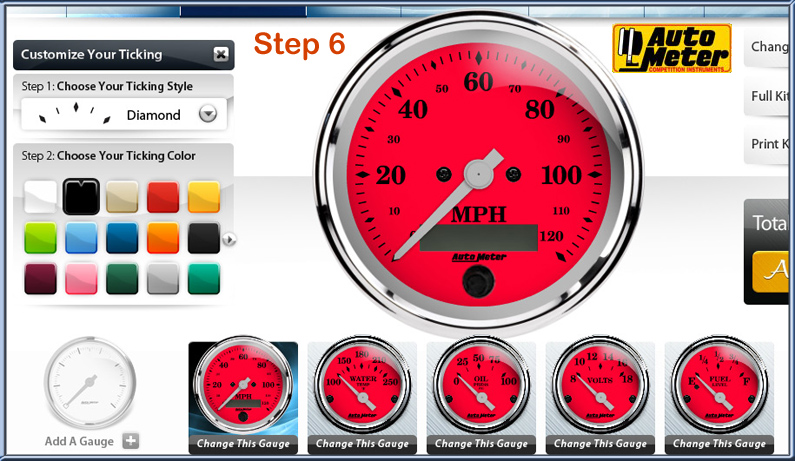
Next is the ticking (pic step 6) (dashes adjacent to the numbers). After some deliberation we went with the stacked option that we think looks pretty sharp (pic shows diamond style). The next step is to select a retainer color. The retainer is the inner ring that sits on the gauge face.
Configure the pointer (or needle). As far as physical appearance and shape, options are limited to either standard or old time. Your choices for the color of both the pointer and hub/tail portion are limitless. To differentiate the two for this example we chose a dark grey pointer and black hub/tail.
Once you’ve selected a bezel, the left portion of the screen changes to allow a choice of your glass. The options here are domed or flat.
Incandescent lighting is the standard option, but LED options in white, blue, green, red, and amber are available.
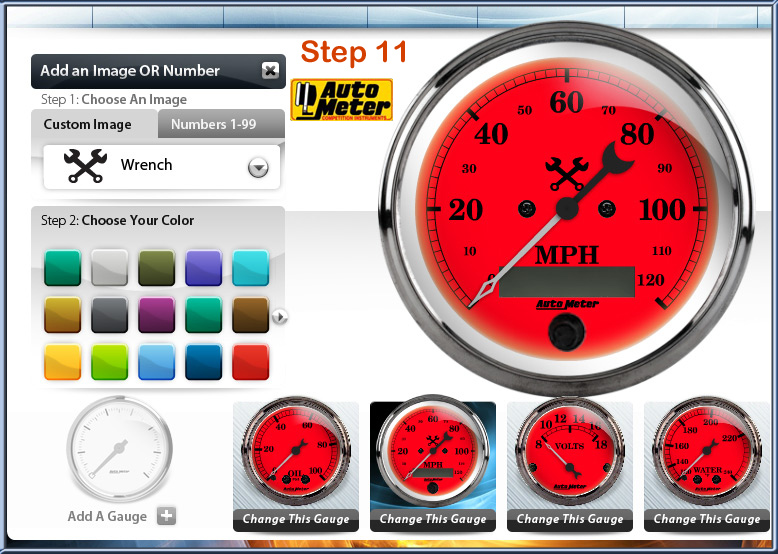
Last, but certainly not least, is the option to add an image to your gauge faces (pic step 11). We opted for the crossed wrenches as it best matches our brand, but images such as the NASCAR logo, a snake, eagle, pistons, and many more are available.
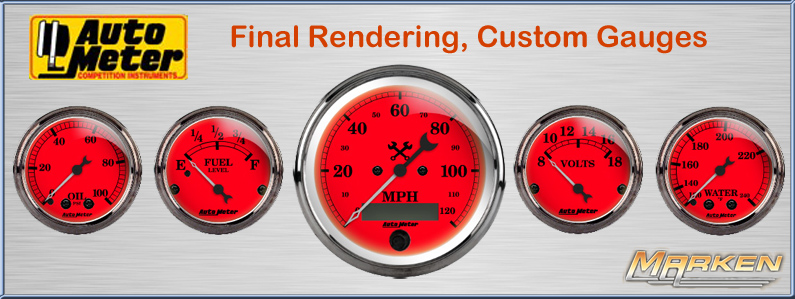
When you’re done, the Full Kit View button allows viewing of your entire kit on the screen. Clicking on any of the gauges gives you an opportunity to go back and tweak if necessary.
Once you are happy with your kit, you can print a full size version for mock ups. Finally, you can register with an email address and password to save the kit you’ve designed. This allows you to access it from anywhere at any time.
Total cost for this rendering example as of Oct 2015: $834.00 USD before shipping and taxes.
News
Industry News
Loading

You must login to post comments.